Fault Injection
-
 Thomas Jungbauer
( Lastmod: 2024-05-05 )
-
3 min read
Thomas Jungbauer
( Lastmod: 2024-05-05 )
-
3 min read
Tutorial 8 of OpenShift 4 and Service Mesh tries to cover Fault Injection by using Chaos testing method to verify if your application is running. This is done by adding the property HTTPFaultInjection to the VirtualService. The settings for this property can be for example: delay, to delay the access or abort, to completely abort the connection.
"Adopting microservices often means more dependencies, and more services you might not control. It also means more requests on the network, increasing the possibility for errors. For these reasons, it’s important to test your services’ behavior when upstream dependencies fail." [1]
Preparation
Before we start this tutorial, we need to clean up our cluster. This is especially important when you did the previous training Limit Egress/External Traffic.
oc delete deployment recommendation-v3
oc scale deployment recommendation-v2 --replicas=1
oc delete serviceentry worldclockapi-egress-rule
oc delete virtualservice worldclockapi-timeout
Verify that 2 pods for the recommendation services are running (with 2 containers)
oc get pods -l app=recommendation -n tutorial
NAME                                 READY   STATUS    RESTARTS   AGE
recommendation-v1-69db8d6c48-h8brv   2/2     Running   0          4d20h
recommendation-v2-6c5b86bbd8-jnk8b   2/2     Running   0          4d19h
Abort Connection with HTTP Error 503
For the first example, we will need to modify the VirtualService and the DestinationRule. The VirtualService must be extended with a http fault section, which will abort the traffic 50% of the time.
Create the VirtualService
apiVersion: networking.istio.io/v1alpha3
kind: VirtualService
metadata:
  name: recommendation
spec:
  hosts:
  - recommendation
  http:
  - fault:
      abort:
        httpStatus: 503
        percent: 50
    route:
    - destination:
        host: recommendation
        subset: app-recommendation
Apply the change
oc replace -f VirtualService-abort.yamlExisting VirtualService with the name recommendation will be overwritten. Create the DestinationRule
apiVersion: networking.istio.io/v1alpha3
kind: DestinationRule
metadata:
  name: recommendation
spec:
  host: recommendation
  subsets:
  - labels:
      app: recommendation
    name: app-recommendation
Apply the change
oc replace -f destinationrule-faultinj.yamlExisting Destination with the name recommendation will be overwritten. Check the traffic and verify that 50% of the connections will end with a 503 error:
export INGRESS_GATEWAY=$(oc get route customer -n tutorial -o 'jsonpath={.spec.host}')
sh ~/run.sh 1000 $GATEWAY_URL
Clean Up
oc delete virtualservice recommendationTest slow connection with Delay
More interesting, in my opinion, to test is a slow connection. This can be tested by adding the fixedDelay property into the VirtualService. Like in the example below, we will use a VirtualService. This time delay instead of abort is used. The fixDelay defines a delay of 7 seconds for 50% of the traffic.
apiVersion: networking.istio.io/v1alpha3
kind: VirtualService
metadata:
  name: recommendation
spec:
  hosts:
  - recommendation
  http:
  - fault:
      delay:
        fixedDelay: 7.000s
        percent: 50
    route:
    - destination:
        host: recommendation
        subset: app-recommendation
If you now send traffic into the application, you will see that some answers will have a delay of 7 seconds. Keep sending traffic in a loop.
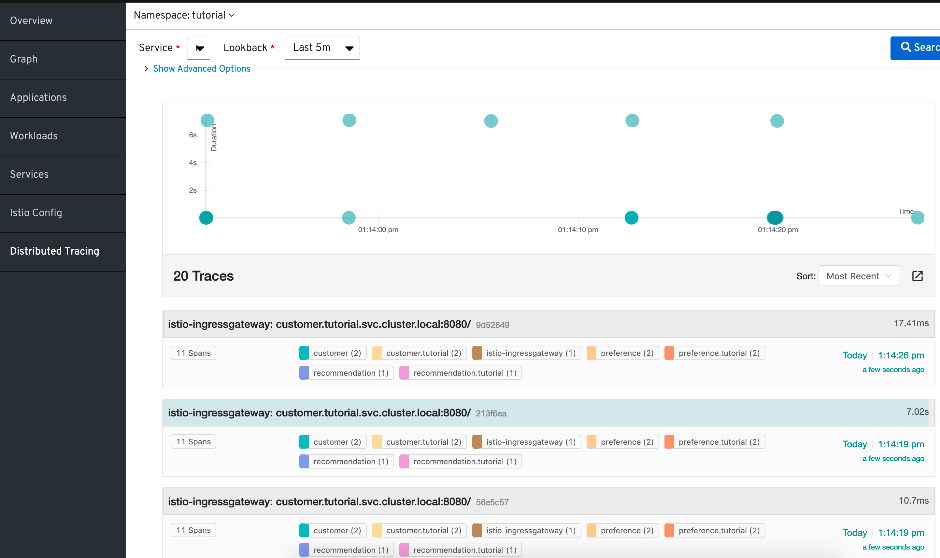
Even more visible it will be, when you goto "Distributed Tracing" at the Kiali UI, select the service recommendation and a small lookback of maybe 5min. You will find that some requests are very fast, while other will tage about 7 seconds.
Retry on errors
If a microservice is answering with an error, Service Mesh/Istio will automatically try to reach another pod providing the service. These retries can be modified. In order to make everything visible, we will use Kiali to monitor the traffic.
We start by sending traffic into the application. This should be split evenly between v1 and v2 of the recommendation microservice
sh ~/run.sh 1000 $GATEWAY_URL# 8329: customer => preference => recommendation v1 from 'f11b097f1dd0': 11145 # 8330: customer => preference => recommendation v2 from '3cbba7a9cde5': 9712 # 8331: customer => preference => recommendation v1 from 'f11b097f1dd0': 11146 # 8332: customer => preference => recommendation v2 from '3cbba7a9cde5': 9713 # 8333: customer => preference => recommendation v1 from 'f11b097f1dd0': 11147In Kiali this ia visible in the Graphs, using the settings: "Versioned app graph" and "Requests percentage"
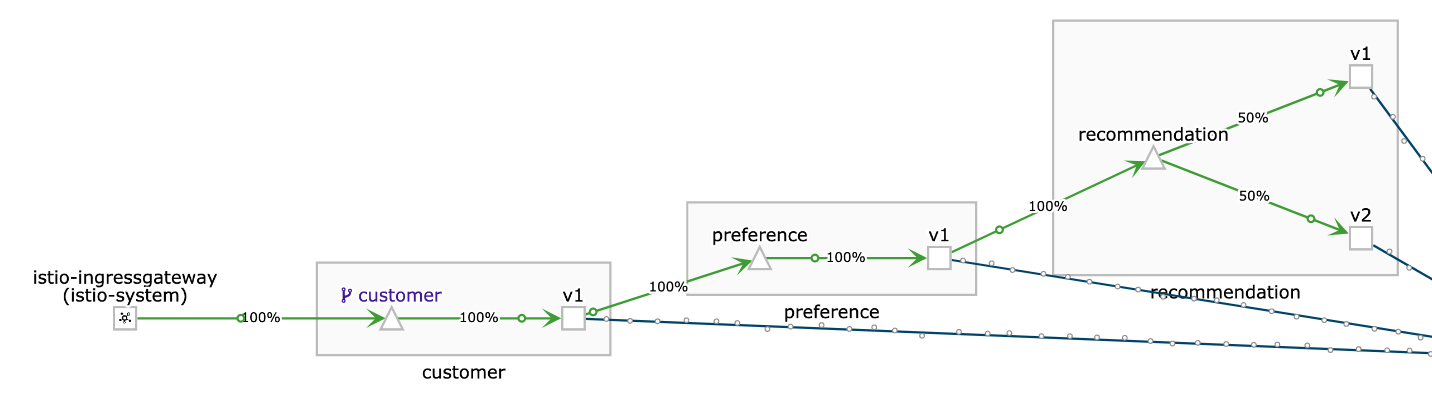 Figure 2. Traffic is split by 50% between recommendation v1 nd v2
As second step we need to enable the nasty mode for the microservice v2. This will simulate an outage, respoding with error 503 all the time. This change must be done inside the container:
oc exec -it $(oc get pods|grep recommendation-v2|awk '{ print $1 }'|head -1) -c recommendation /bin/bashInside the container use the following command and exit the container again
curl localhost:8080/misbehaveKiali will now show that v1 will get 100% of the traffic, while v2 is shown as red. When you select the red square of v2 and then move the mouse over the red cross for the failing application, you will see that the pd itself is ready, but that 100% of the traffic is currently failing.
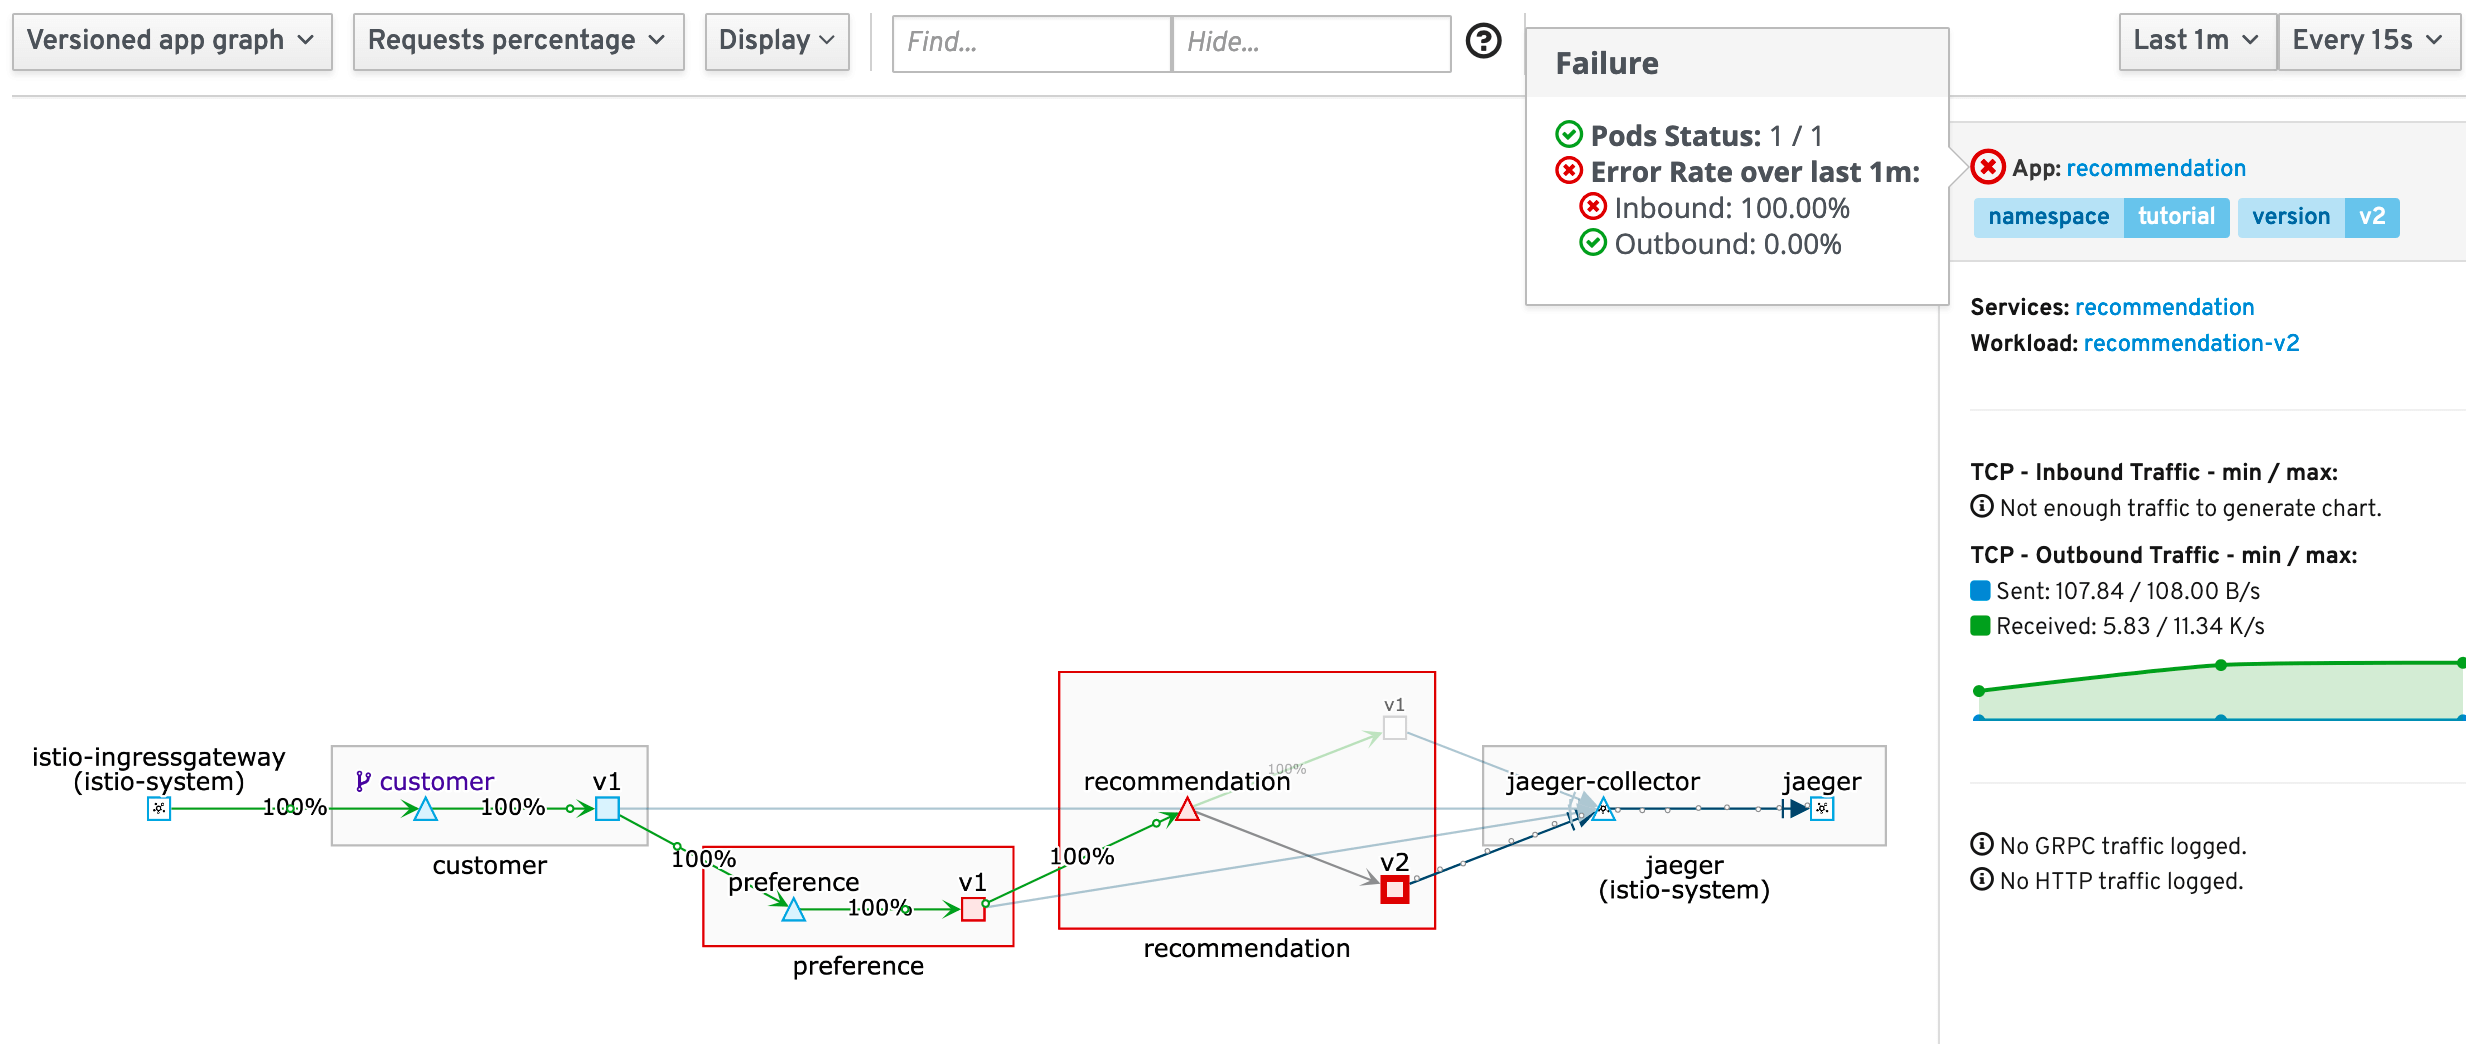 Figure 3. Traffic for v2 is failing
revert the change and fix v2 service
oc exec -it $(oc get pods|grep recommendation-v2|awk '{ print $1 }'|head -1) -c recommendation /bin/bashcurl localhost:8080/behaveVerify in Kiali that everything is "green" again and that the traffic is split by 50% between v1 and v2.
Sources
Copyright © 2020 - 2024 Toni Schmidbauer & Thomas Jungbauer