Step 6 - Scanning with ACS
June 28, 2023
Updated Dec 18, 2025
-
![]() Thomas Jungbauer
-
10 min read
(1918 words)
Thomas Jungbauer
-
10 min read
(1918 words)
In this step we will install Advanced Cluster Security (ACS) and create 2 new steps in our Pipeline to scan the image for vulnerabilities and security policy. A custom security policy, configured in ACS, will verify if the image is signed.
Goals
The goals of this step are:
Install ACS.
Create a custom security policy into ACS.
Configure CoSign integration in ACS.
Create a step in the Pipeline to perform an image scan (vulnerabilities).
Create a step in the Pipeline to perform an image check (security policies).
Install Advanced Cluster Security (ACS)
We will install ACS on our cluster which will be called local-cluster inside ACS.
The deployment will happen via Argo CD (OpenShift GitOps) that will use the following Helm Chart: RHACS
The Argo CD Application will trigger the deployment which will take several minutes.
| The deployment will install a minimal version of ACS and tries to limit the required resources and replicas. For production environments, you probably want to increase the settings. |
apiVersion: argoproj.io/v1alpha1
kind: Application
metadata:
  name: in-cluster-init-rhacs
  namespace: openshift-gitops
spec:
  destination:
    namespace: default
    server: 'https://kubernetes.default.svc' (1)
  info:
    - name: Description
      value: >-
        Initialize Red Hat Advanced Cluster Security and deploy Central and
        SecuredCluster
  project: in-cluster
  source:
    path: charts/rhacs-full-stack (2)
    repoURL: 'https://github.com/tjungbauer/helm-charts' (3)
targetRevision: main| 1 | Installing on the local cluster. |
| 2 | Path to the Helm chart. |
| 3 | URL to the Helm chart repository. |
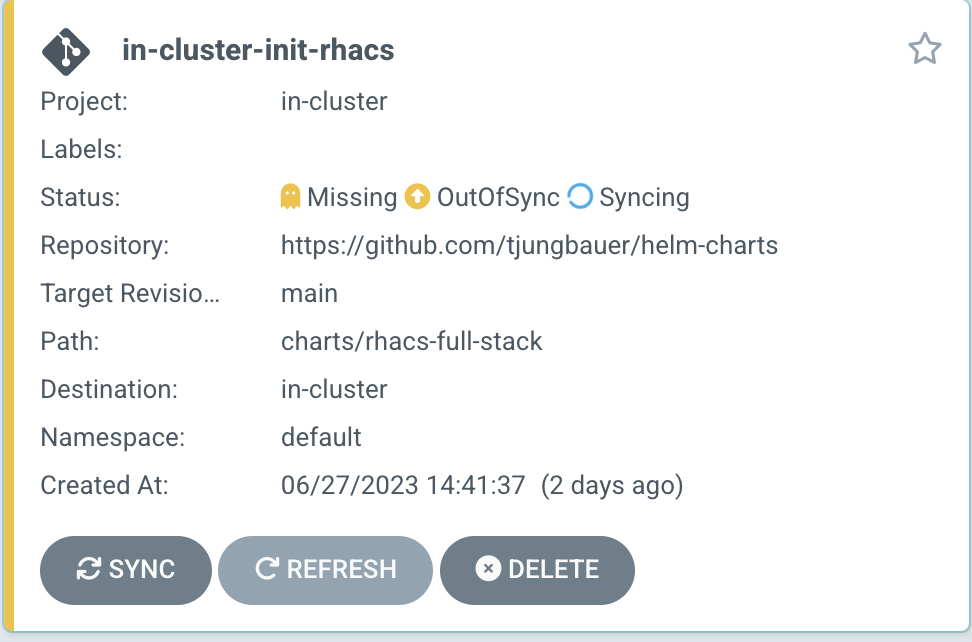
This GitOps Application will start a full-stack ACS deployment. It does (in this exact order):
Installs the ACS Operator into rhacs-operator
Verifies if the Operator is ready
Creates the Namespace stackrox
Adds a ConsoleLink in the upper right action menu of OpenShift
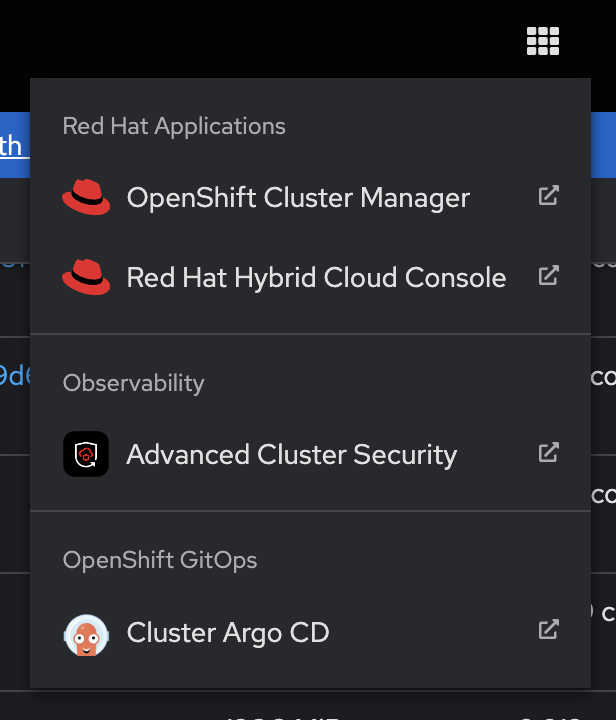 Figure 2. ACS ConsoleLink
Creates the Central custom resource with minimum resources
Creates an init-bundle to add the first (local) cluster
Adds the custom resource SecureCluster to install the rest of the ACS components
And finally, runs a basic configuration that enables authentication via OpenShift and provides the kubeadmin user admin privileges. This can be disabled in the values file if you prefer not to configure this, or if kubeadmin does not exist anymore in your cluster.
The whole process will take a while and uses syncwaves and hooks.
Configure ACS Integration
Generate Authentication Token
Create an authentication Token in ACS
Go to
"Platform Configuration > Integrations > API Token"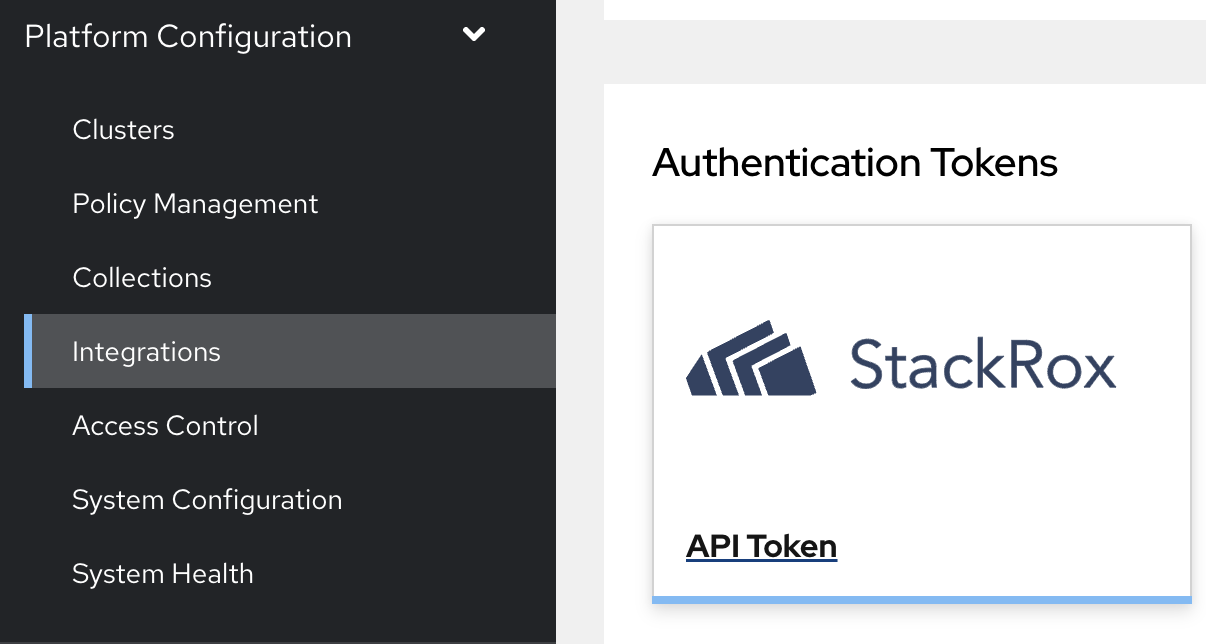 Figure 3. ACS Generate Token
Generate a new Token with at least Continuous Integration privileges and save the created Token.
Back in OpenShift, a Secret must be created with the key rox_api_token
kind: Secret
apiVersion: v1
metadata:
  name: stackrox-secret
  namespace: ci
data:
  rox_api_token: <base 64 Token> (1)
type: Opaque
1 Base64 decoded ACS Token. Create a 2nd Secret that contains the ACS endpoint and its port:
kind: Secret
apiVersion: v1
metadata:
  name: stackrox-endpoint
  namespace: ci
stringData:
  rox_central_endpoint: central-stackrox.apps.ocp.aws.ispworld.at:443 (1)
type: Opaque
1 The endpoint URL of my example cluster. Note: the port MUST be added here.
Integrate CoSign with ACS
Configure CoSign Integration
During Step 5 we have created a CoSign key pair to sign our images. To integrate with ACS, we need to retrieve the public key. In OpenShift, open the Secret signing-secrets in the Namespace openshift-pipelines and extract the key cosign.pub.
It will look something like tjis:
-----BEGIN PUBLIC KEY-----
key...
-----END PUBLIC KEY-----
In ACS, go to
"Platform Configuration > Integrations > Signature"and create a new CoSign integration.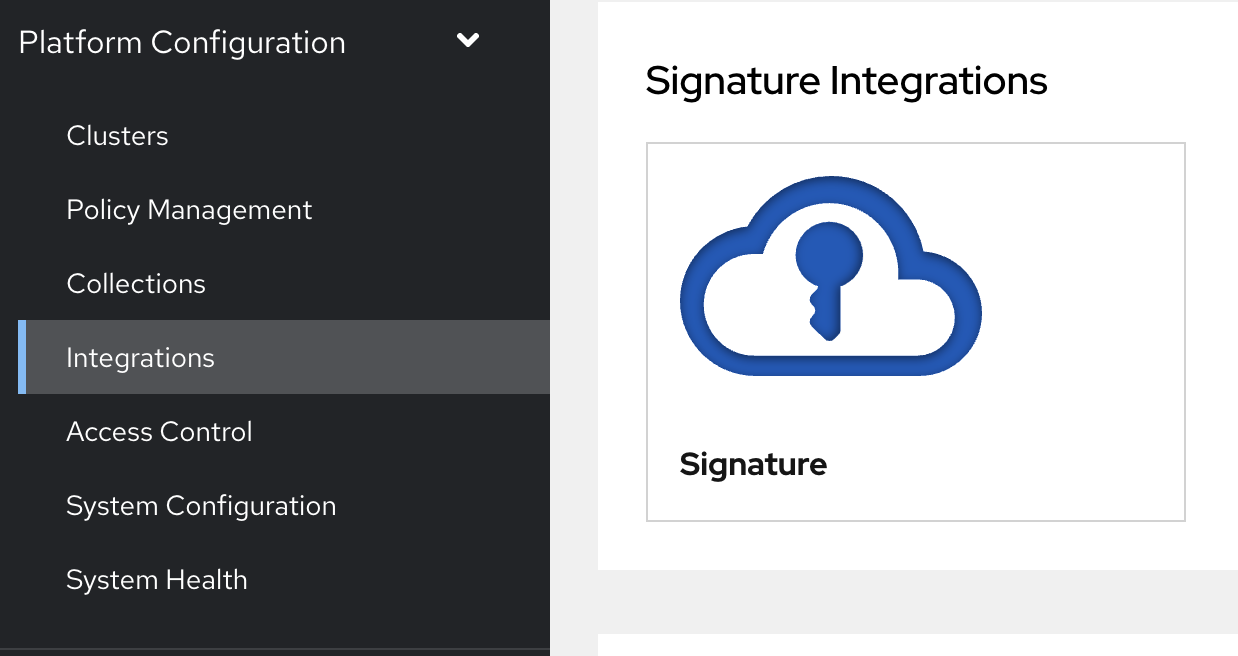 Figure 4. ACS CoSign Integration
Enter a name and the public key and activate this integration
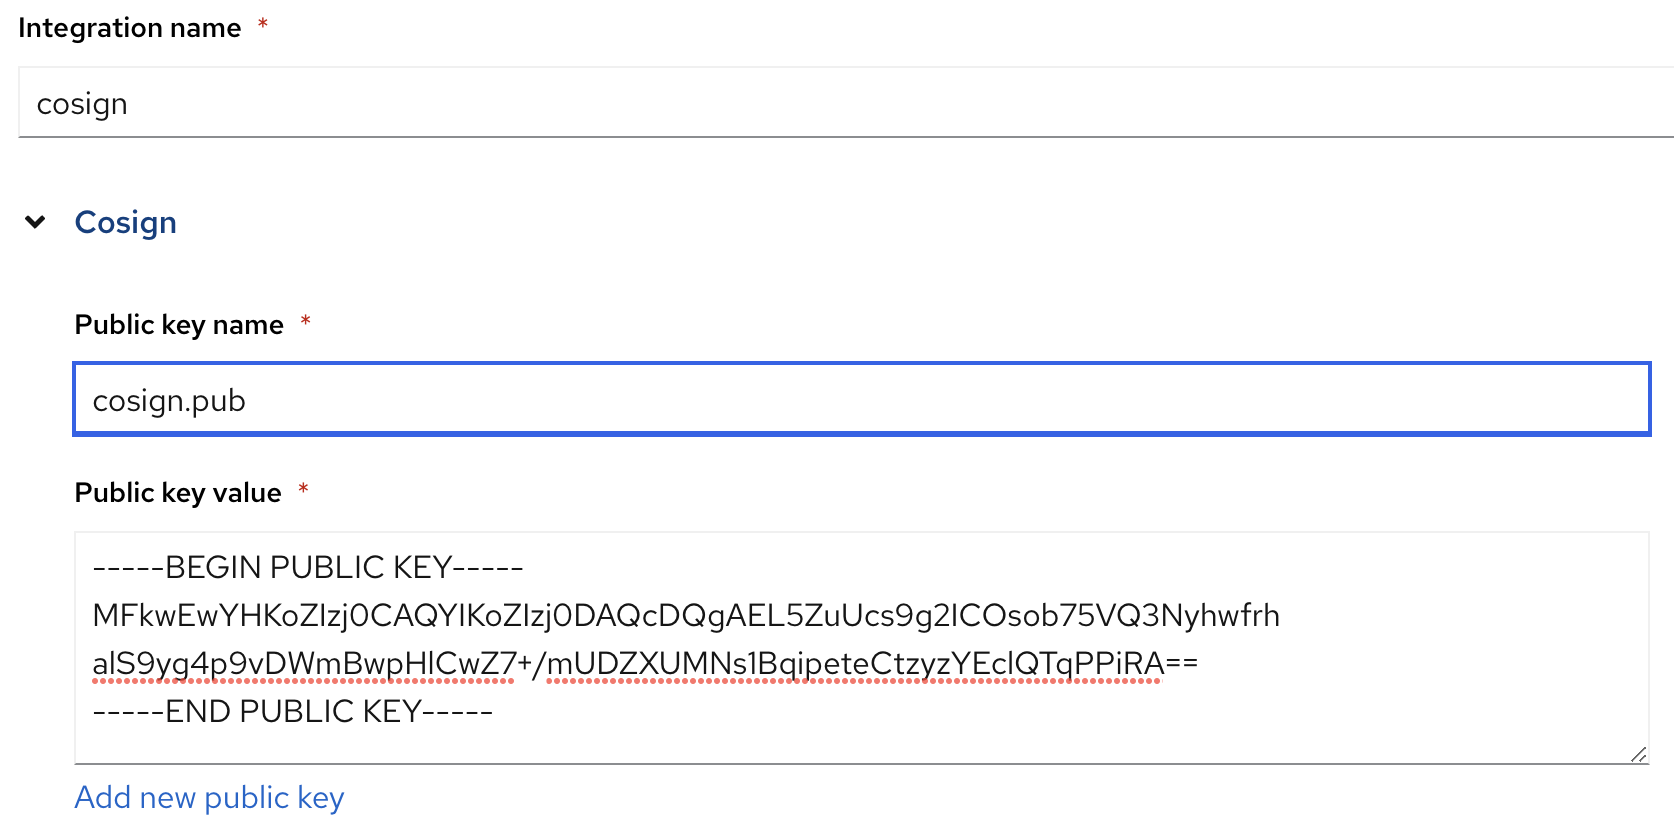 Figure 5. ACS Create CoSign Integration
This will enable ACS to verify the CoSign signature of the image.
Create a Custom Policy that verifies the Signature
Create a custom security policy, that verifies if our image has been signed or not.
To be sure that every image is correctly signed, we create a custom security policy that verifies this signature using our CoSign integration. This policy can be configured as inform or enforce. Enforce means that the pipeline will fail (during the Task acs-image-check) if the image signature cannot be checked.
Let’s create our policy by hand for this time. However, it is also possible to export/import rules. The important part here is that link to the CoSign integration is valid, otherwise ACS cannot verify the signature.
Open
"Platform Configuration > Policy > and click the button Create Policy"Name: Trusted Signature Policy
Severity: High
Categories: Security Best Practices
Click Next
Lifecycle stage: check Build and Deploy
Response method: Inform and enforce > This will make the Task in the Pipeline fail when the signature cannot be verified.
Configure enforcement behavior:
Activate: Enforce on Build > Only fail for build lifecycles.
Leave Deployment disabled for now. A good practice would be to enable it, but for other steps in this series, it will be required to keep it disabled for now.
Leave Runtime disabled.
Click Next
As policy criteria find "Image Registry > Image signature" and drag and drop it to the policy section
 Figure 6. ACS Policy Criteria
Click on Select and select the CoSign integration
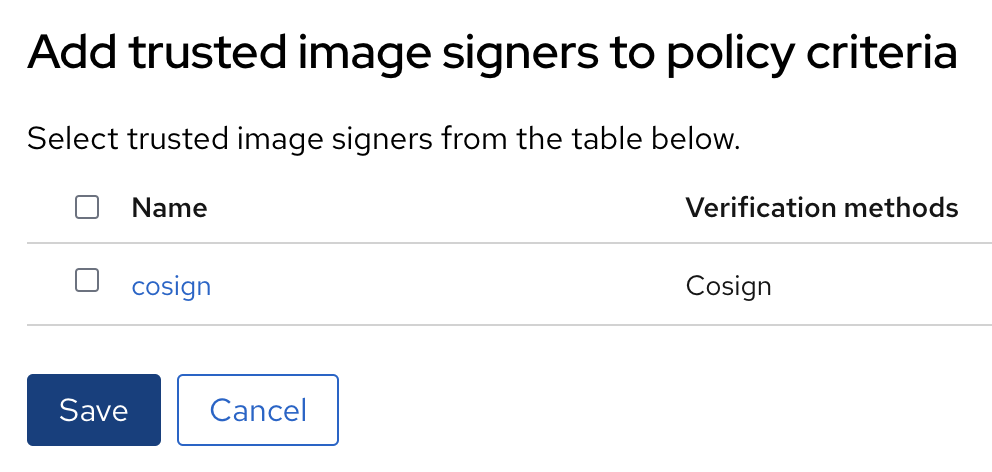 Figure 7. ACS Assign CoSign integration to policy
Click Next
Leave the Policy scope for now and click Next
Review the Policy and Save it.
Prepare the Pipeline Tasks
Now, finally, after all these preparations we are going to integrate ACS into our Pipeline. For this, we will create 2 tasks:
acs-image-scan: Will scan the image for vulnerabilities
acs-image-check: Will verify if the image would violate any security policy, especially the custom policy we have created.
Both checks will use the roxctl command line tool.
| It is recommended to add these two Tasks to any Pipeline system you are using when you have ACS installed to leverage the full potential of ACS. It does not matter if you are using Tekton, Jenkins or something else. You can find examples of integrations at the Git repository: https://github.com/stackrox/contributions/. |
Task acs-image-scan
To scan for vulnerabilities, create the following Task. It leverages the command line tool roxctl which can also be used on your local machine to perform such scans manually.
apiVersion: tekton.dev/v1beta1
kind: Task
metadata:
  name: acs-image-scan
  namespace: ci
spec:
  description: >-
    Scan an image with StackRox/RHACS. This tasks allows you to check an
    image against vulnerabilities.
  params:
    - description: |
        Secret containing the address:port tuple for StackRox Central)
        (example - rox.stackrox.io:443)
      name: rox_central_endpoint
      type: string
    - description: Secret containing the StackRox API token with CI permissions
      name: rox_api_token
      type: string
    - description: |
        Full name of image to scan (example -- gcr.io/rox/sample:5.0-rc1)
      name: image
      type: string
    - default: 'false'
      description: |
        When set to `"true"`, skip verifying the TLS certs of the Central
        endpoint.  Defaults to `"false"`.
      name: insecure-skip-tls-verify
      type: string
    - default: 'registry.access.redhat.com/ubi9@sha256:089bd3b82a78ac45c0eed231bb58bfb43bfcd0560d9bba240fc6355502c92976'
      name: ubi9
      type: string
  results:
    - description: Output of `roxctl image check`
      name: check_output
      type: string
  steps:
    - env: (1)
        - name: ROX_API_TOKEN
          valueFrom:
            secretKeyRef:
              key: rox_api_token
              name: $(params.rox_api_token)
        - name: ROX_CENTRAL_ENDPOINT
          valueFrom:
            secretKeyRef:
              key: rox_central_endpoint
              name: $(params.rox_central_endpoint)
      image: $(params.ubi9)
      name: rox-image-scan
      resources: {}
      script: | (2)
        #!/usr/bin/env bash

        set +x

        curl -s -k -L -H "Authorization: Bearer $ROX_API_TOKEN" \
          "https://$ROX_CENTRAL_ENDPOINT/api/cli/download/roxctl-linux" \
          --output ./roxctl  \
          > /dev/null

        chmod +x ./roxctl  > /dev/null

        if [ "$(params.insecure-skip-tls-verify)" = "true" ]; then

          export ROX_INSECURE_CLIENT_SKIP_TLS_VERIFY=true

        fi

./roxctl image scan -e "$ROX_CENTRAL_ENDPOINT" --image "$(params.image)" (3)| 1 | Token end endpoint which we defined as Secrets |
| 2 | Script that downloads and executes the CLI roxctl |
| 3 | Calling "roxctl image scan" |
Task Image Check
To verify the policies that are configured in ACS we create the Task acs-image-check. We will use the command line tool roxctl again.
| ACS comes with several (80+) build-in policies. Some of them are activated, but none of them configured to enforce a policy. Except, the policy Trusted Signature Policy we have created above. |
apiVersion: tekton.dev/v1beta1
kind: Task
metadata:
  name: acs-image-check
  namespace: ci
spec:
  description: >-
    Policy check an image with StackRox/RHACS This tasks allows you to check an
    image against build-time policies and apply enforcement to fail builds. It's
    a companion to the stackrox-image-scan task, which returns full
    vulnerability scan results for an image.
  params:
    - description: |
        Secret containing the address:port tuple for StackRox Central)
        (example - rox.stackrox.io:443)
      name: rox_central_endpoint
      type: string
    - description: Secret containing the StackRox API token with CI permissions
      name: rox_api_token
      type: string
    - description: |
        Full name of image to scan (example -- gcr.io/rox/sample:5.0-rc1)
      name: image
      type: string
    - default: 'false'
      description: |
        When set to `"true"`, skip verifying the TLS certs of the Central
        endpoint.  Defaults to `"false"`.
      name: insecure-skip-tls-verify
      type: string
    - default: 'registry.access.redhat.com/ubi9@sha256:089bd3b82a78ac45c0eed231bb58bfb43bfcd0560d9bba240fc6355502c92976'
      name: ubi9
      type: string
  results:
    - description: Output of `roxctl image check`
      name: check_output
      type: string
  steps:
    - env: (1)
        - name: ROX_API_TOKEN
          valueFrom:
            secretKeyRef:
              key: rox_api_token
              name: $(params.rox_api_token)
        - name: ROX_CENTRAL_ENDPOINT
          valueFrom:
            secretKeyRef:
              key: rox_central_endpoint
              name: $(params.rox_central_endpoint)
      image: $(params.ubi9)
      name: rox-image-check
      resources: {}
      script: |
        #!/usr/bin/env bash (2)

        set +x

        curl -s -k -L -H "Authorization: Bearer $ROX_API_TOKEN" \
          "https://$ROX_CENTRAL_ENDPOINT/api/cli/download/roxctl-linux" \
          --output ./roxctl  \
          > /dev/null

        chmod +x ./roxctl  > /dev/null

        if [ "$(params.insecure-skip-tls-verify)" = "true" ]; then

          export ROX_INSECURE_CLIENT_SKIP_TLS_VERIFY=true

        fi

./roxctl image check -e "$ROX_CENTRAL_ENDPOINT" --image "$(params.image)" (3)| 1 | Token end endpoint which we defined as Secrets |
| 2 | Script that downloads and executes the CLI roxctl |
| 3 | Calling "roxctl image check" |
Extend the Pipeline
Now it is time to extend our Pipeline with the two tasks. Add the following blocks to the Pipeline secure-supply-chain:
    - name: acs-image-scan (1)
      params: (2)
        - name: rox_central_endpoint
          value: stackrox-endpoint
        - name: rox_api_token
          value: stackrox-secret
        - name: image
          value: '$(params.IMAGE_REPO):$(params.IMAGE_TAG)'
        - name: insecure-skip-tls-verify (3)
          value: 'true'
      runAfter: (4)
        - build-sign-image
      taskRef:
        kind: Task
        name: acs-image-scan
    - name: acs-image-check (5)
      params: (6)
        - name: rox_central_endpoint
          value: stackrox-endpoint
        - name: rox_api_token
          value: stackrox-secret
        - name: image
          value: '$(params.IMAGE_REPO):$(params.IMAGE_TAG)'
        - name: insecure-skip-tls-verify (7)
          value: 'true'
      runAfter:
        - build-sign-image (8)
      taskRef:
        kind: Task
name: acs-image-check| 1 | Scanning for vulnerabilities |
| 2 | Provide parameters to the Task |
| 3 | Set to 'false' if you have valid certificates. |
| 4 | Run after the Task "build-sign-image" |
| 5 | Scanning security policies |
| 6 | Provide parameters to the Task |
| 7 | Set to 'false' if you have valid certificates. |
| 8 | Run after the Task "build-sign-image" |
The Pipeline will now look like this:

Execute the Pipeline
Let’s trigger another PipelineRun by updating the README.md of our source code. While the previous Tasks should run successfully, let’s monitor our two ACS tasks. However, now the Pipeline is running quite long already. This means it is time for a coffee.
Still here? Good, eventually our two ACS tasks have finished successfully.
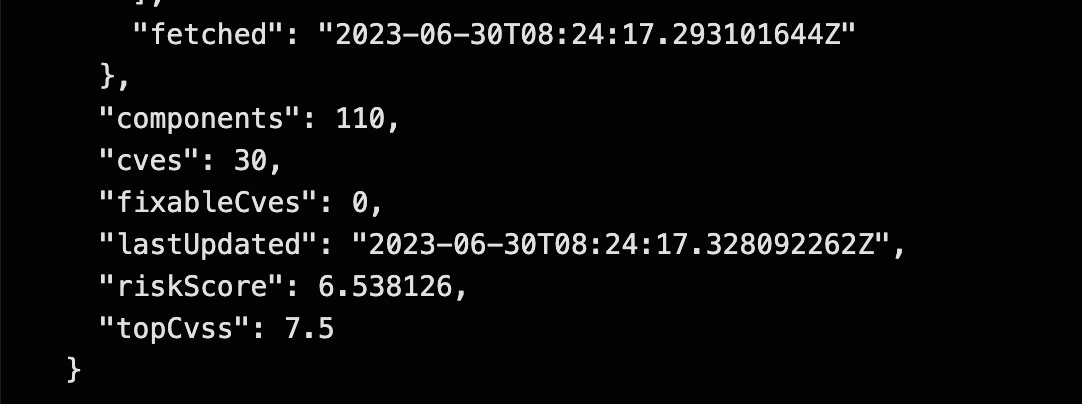
The Task image-scan is looking for vulnerabilities and did not find any high-severity issues.
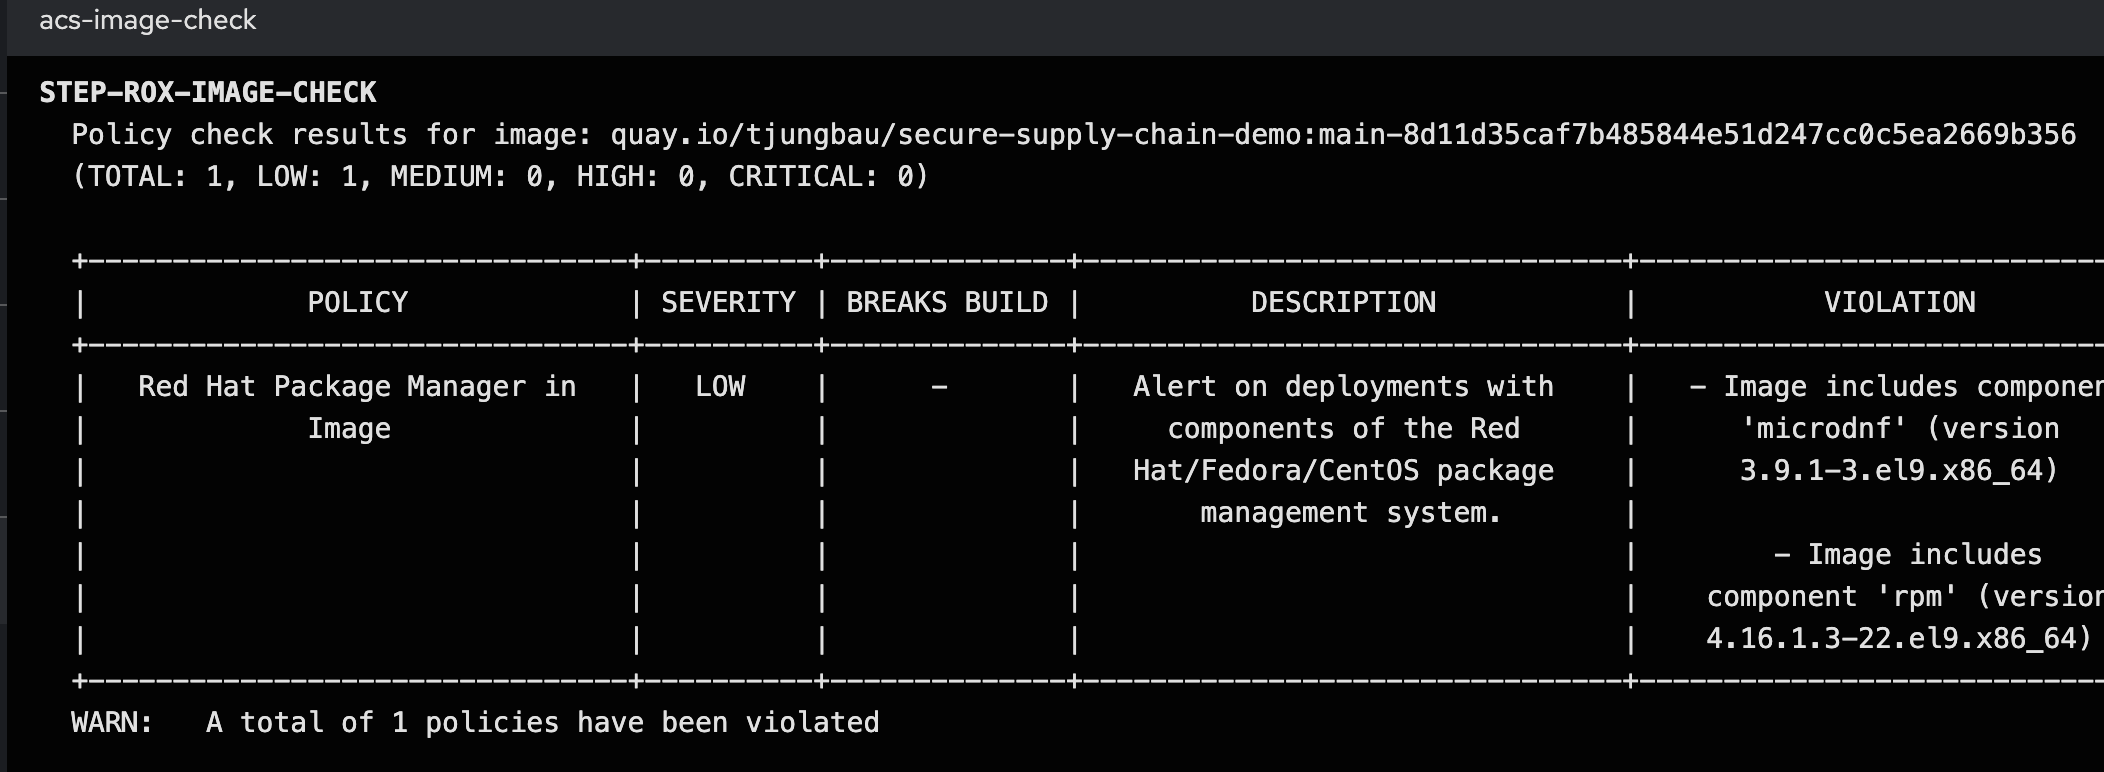
The Task image-check verified the security policies. You can see in the Logs that the *Trusted Signature Policy was not violated. Another might be shown, but since all other policies are configured to notify only (instead of "enforce"), the whole Task will end successfully. This is good enough for our first tests. The important bit is that the image has been signed.
Summary
Now we have integrated ACS and are using its powers to scan images for vulnerabilities and check them against security policies. Two Tasks have been created that are executed after the image has been built and are leveraging ACS’s command line tool roxctl
Whenever vulnerabilities are found, or security policies are violated (if the policy is set to enforce) the Pipeline will fail.
Such tasks should be built in any pipeline you are creating, independently of using ACS or any other security verification tool.
In the next step, we will create a Task that creates a Software Bill of Material (SBOM) for us.
Related Articles
Copyright © 2020 - 2026 Toni Schmidbauer & Thomas Jungbauer
Discussion
Comments are powered by GitHub Discussions. To participate, you'll need a GitHub account.
By loading comments, you agree to GitHub's Privacy Policy. Your data is processed by GitHub, not by this website.